Opening an Assignment
How to download and open an assignment in VSCode.
Opening an Assignment in VSCode
1. Open your file browser and navigate to your CS220 folder
- If you do not already have a CS220-specific folder, you should make one so all your files are grouped together. Place it somewhere easy to remember.
2. Inside your CS220 folder, create a new folder for the assignment.
3. Download the provided ZIP file and place it inside the newly created assignment folder.
4. Right-click the ZIP archive and extract the contents into the folder.
5. Open VSCode, click on File -> Open Folder..., then navigate to the extracted contents.
6. Once you see the contents of the assignment (the folder containing a package.json), click Open.
7. Inside of VSCode, click on the explorer (top of the left sidebar) if it is not already revealed.
- Your explorer should look very similar to this:
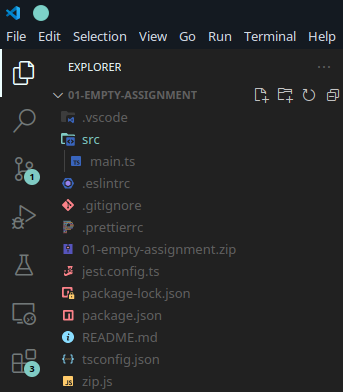
- After opening the folder, you may have received a notification on the bottom right of your screen prompting you to install some extensions. It is recommended that you do.
8. Open a VSCode Terminal
- Click on
Terminal -> New Terminal. - You should see a box on the bottom open up. This terminal is where you will execute commands to run, debug, test, and build assignments.
- TIP: Use the up/down arrow keys to cycle through command history so you do not have to rewrite commands.
- TIP: Press tab to auto-complete
9. Run npm install
- Inside the terminal, type the command
npm i(shorthand fornpm install), then press enter. - You should see some output that mentions the dependencies being installed.
- After it has finished, you should see a new
node_modules/folder in the explorer.
10. Run the assignment
- Run the command
npm run startto run thesrc/main.tsfile - See more instruction is the running and debugging page.